How to make a tattoo stencil from a photo
The best tattoo stencils start with a clear visual idea. Here is how to prepare a photo so its key shapes survive the move to line art.
1. Pick a photo with a clear focal point
Choose one subject: a face, animal, flower, object, or architectural detail. The subject should be well lit and separate from the background. Avoid motion blur and tiny details that will disappear at tattoo size.
2. Simplify before you generate
Crop away distractions and decide which features matter most. A stencil needs hierarchy: main contour first, meaningful interior details second, texture only where it supports the idea.
3. Choose a line style that suits the idea
Classic outlines suit bold graphic designs. Stipple and crosshatch can suggest tone without relying on solid shading. Test a small number of variants rather than adding every possible detail.
4. Review it at the intended size
Zoom out and check whether the important shapes remain distinct. If it looks busy at a small size, simplify it further. Your tattoo artist can then adapt the final design for the body and skin.
A photo reference, simplified into stencil artwork.
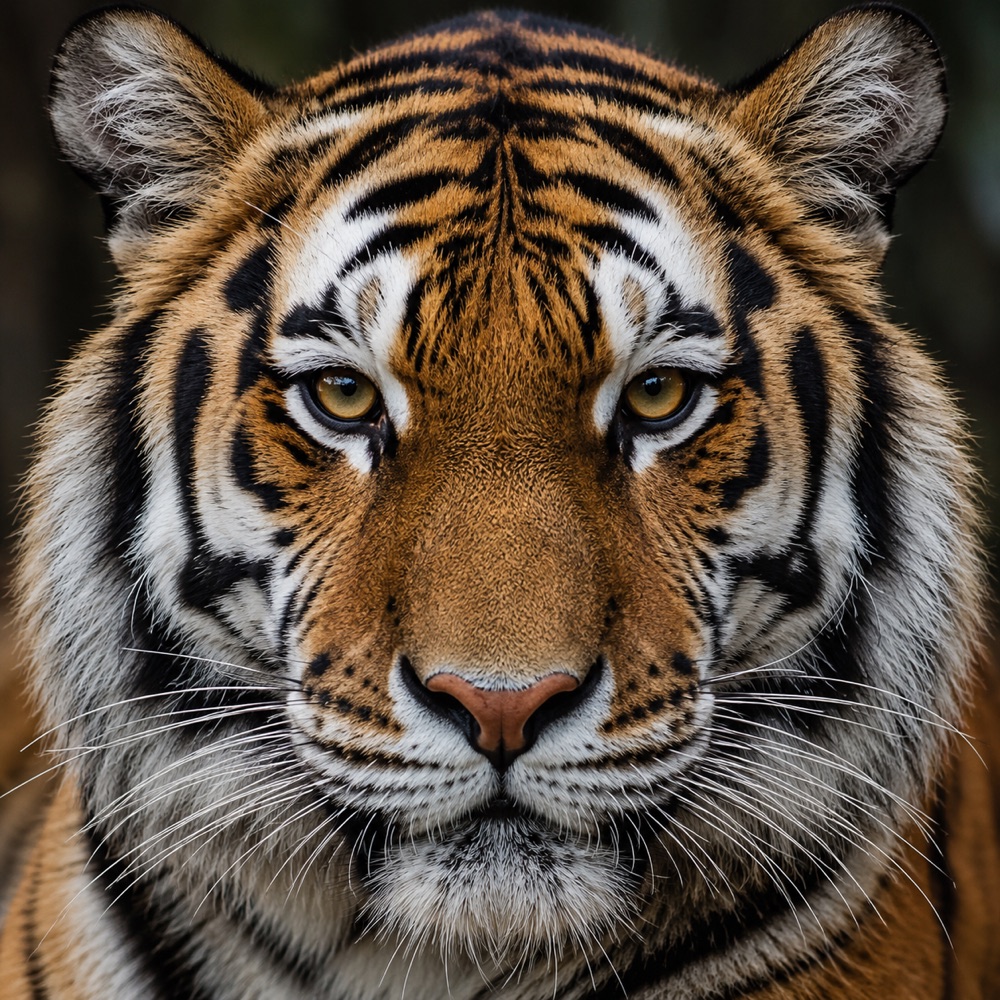
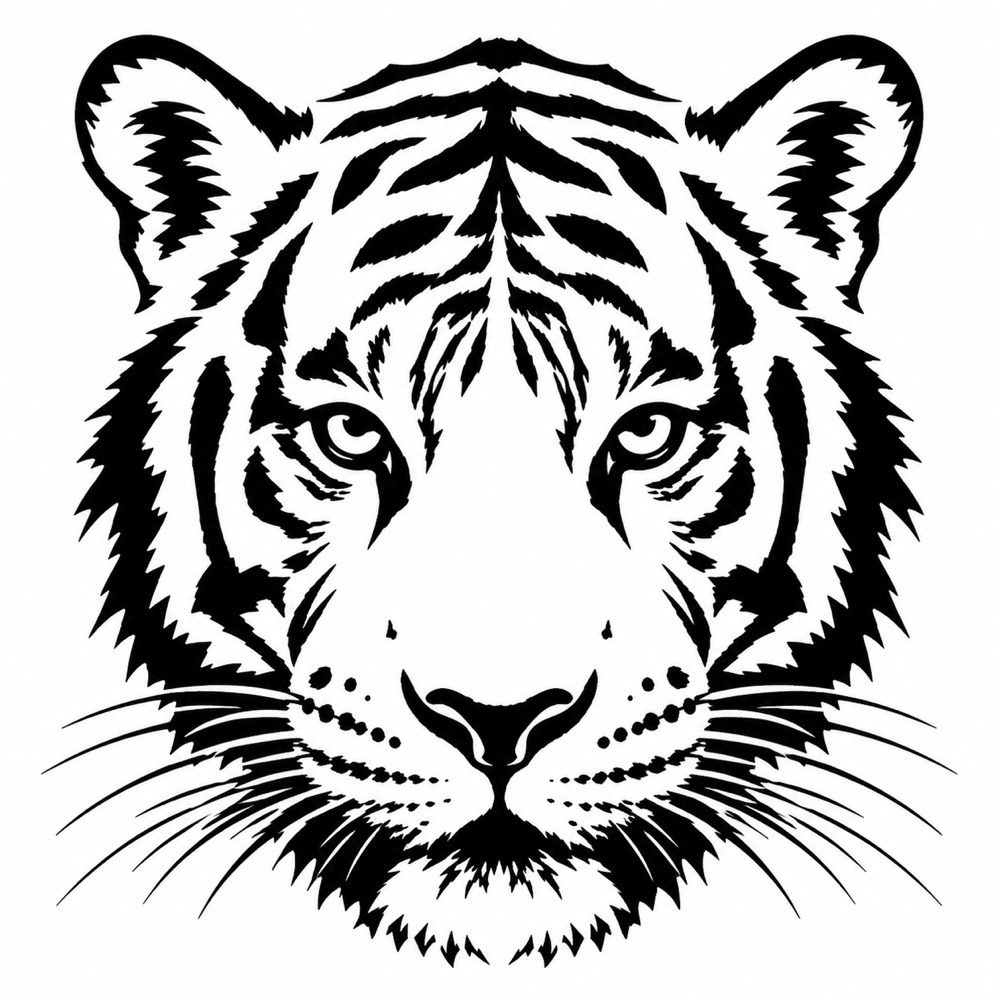
These are the real example assets bundled with Sten AI’s onboarding, not a new generation benchmark. Notice how the stripes and eyes remain recognizable while the fur texture becomes simpler. Generated results vary; review your own result with your artist.
Want more visual references? Compare the tiger, lion and rose pairs, with notes on the details that matter at print size.
5. Export and check the print
Choose PNG when you need an image file for another tool. Choose PDF when you want a page-based layout. Sten AI includes Standard, A4, US Letter, Thermal 58 and Thermal 80 presets and a mirrored export option. Select the layout appropriate for your workflow, then confirm printer scaling rather than assuming the screen size matches the print size.
Mirroring depends on your transfer workflow. Ask your artist or check your printer instructions before mirroring; doing it twice can reverse the design unexpectedly. Make a test print and have the artist review it before transfer.
Follow the photo-to-export workflow in Sten AI
- In the iPhone app, choose Upload Photo and select a reference you own or have permission to use. Crop around the main subject.
- Open Advanced Options and choose a shading style: Classic, Stipple, Crosshatch or Broken Lines. Start with the style that best preserves the important contours.
- Generate the stencil, then inspect the result against your source. AI can alter details; review lettering, symmetry and small shapes rather than accepting the first result automatically.
- From the result screen, choose Export. Select Standard, A4, US Letter, Thermal 58 or Thermal 80 as appropriate, then choose PNG or PDF.
- Check the mirror option before exporting. The current export sheet starts with A4, PDF and mirroring enabled; these defaults are not a recommendation for every printer. Your transfer workflow determines whether mirroring is needed.
- Open the exported file, check its orientation and printer scaling, and make a test print. Review the final dimensions and artwork with your artist.
This walkthrough follows the app’s current controls and export implementation. The captioned app-screen tour shows separate sample screens, not a live generation-to-export recording. Creating the stencil requires the app; generation limits and paid features may apply.
A closer look at the tiger example
The reference contains many tiny fur strands. In the bundled stencil artwork, the broad stripes, ears and eye contours carry the identity instead. Use this comparison to ask which details are essential in your own reference—not as a promise that AI will reproduce a photo exactly.
Troubleshooting your first result
| Problem | What to try next |
|---|---|
| Too many tiny lines | Crop closer, simplify the background and try a less textured style. |
| Important shapes disappear | Choose a sharper, better-lit reference with stronger separation between subject and background. |
| Details look different | Compare against the source and regenerate or have the artist redraw those areas. Inspect lettering manually. |
| Print size looks wrong | Check the PDF preset and printer scaling; confirm the intended dimensions with your artist. |
Use references responsibly
Use your own images or images you have permission to use. Do not assume that converting another artist’s tattoo into a stencil makes it yours to reproduce. This guide covers the app’s design workflow, not tattooing or transfer technique.